
Chào các bạn, trong bài viết ngày hôm nay của Blog Lê Thạch sẽ hướng dẫn các bạn cách để xây dựng một ứng dụng CRUD (CREATE, READ, UPDATE, DELETE) đơn giản sử dụng Reactjs với một framework rất nổi tiếng của PHP, không ai khác đó chính là Laravel. Thông qua ví dụ lần này mình muốn các bạn hiểu được cách tạo một API đơn giản ở backend bằng Laravel và lấy dữ liệu từ đó để đẩy ra front-end ở dạng SPA bằng cách sử dụng Reactjs, nắm vững được các luồng điều khiển của chúng hoạt động như thế nào. Không còn chờ gì nữa, mình sẽ bắt đầu luôn vào bài viết ngay bây giờ.
Preview kết quả:
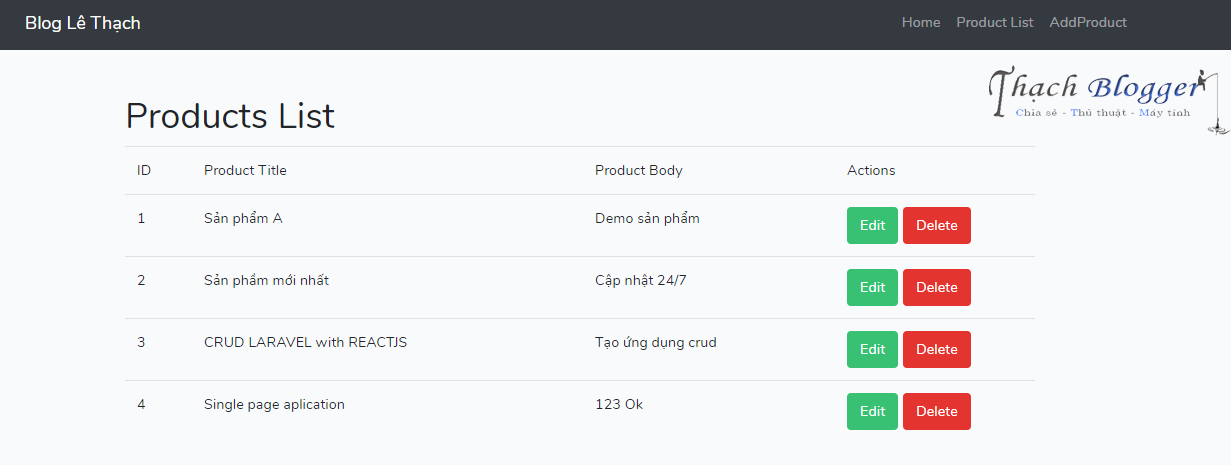
Preview sản phẩm
Phần 1: Làm việc với phần backend Laravel 7
Bước 1: Cài đặt Laravel 7
Đơn giản, bạn chỉ cần mở terminal hoặc command prompt và thực hiện câu lệnh sau:
composer create-project --prefer-dist laravel/laravel crud_reactjs
Ở đây mình tạo ra một thư mục project với tên là crud_reactjs
Bước 2: Cấu hình Database
Ở bước này, bạn mở thư mục .env của project và thực hiện cấu hình các thông số của Database như database name, database username và database password mà bạn đã tạo. Riêng mình thì dùng php myadmin để tạo cơ sở dữ liệu
DB_CONNECTION=mysql
DB_HOST=127.0.0.1
DB_PORT=3306
DB_DATABASE=database name
DB_USERNAME=database username
DB_PASSWORD=database password
Bước 3: Tạo table và Model
Trước tiên mình sẽ tạo ra một migration để tiến hành tạo table trong database. Để tạo migration, ta gõ câu lệnh sau:
php artisan make:migration create_products_table
Sau khi thực thi xong câu lệnh, ta sẽ tìm và đi đến đường dẫn database/migrations để tìm file migration vừa mới tạo và điền đoạn code sau để bắt đầu tạo table tên là ‘products’ với các trường dữ liệu sau:
<?php

use Illuminate\Database\Migrations\Migration;
use Illuminate\Database\Schema\Blueprint;
use Illuminate\Support\Facades\Schema;

class CreateProductsTable extends Migration
{
    /**
     * Run the migrations.
     *
     * @return void
     */
    public function up()
    {
        Schema::create('products', function (Blueprint $table) {
            $table->bigIncrements('id');
            $table->string('title');
            $table->text('body');
            $table->timestamps();
        });
    }

    /**
     * Reverse the migrations.
     *
     * @return void
     */
    public function down()
    {
        Schema::dropIfExists('products');
    }
}
Sau khi tạo xong, bạn tiến hành chạy câu lệnh để insert table vào database
php artisan migrate
Lưu ý: Trường hợp bạn chạy câu lệnh trên mà máy báo lỗi có thể là do type string quá giới hạn 255 ký tự. Bạn cần phải thiết lập thêm thông số ở hàm boot() của file AppServiceProvider.php dưới đây theo đường dẫn sau: app/Providers/AppServiceProvider.php
 public function boot()
 {
     Schema::defaultStringLength(191);
 }
Tiếp theo, ta cần tạo thêm model để quản lý table một cách hiệu quả bằng câu lệnh sau:
php artisan make:model Product
Một model được tự động sinh ra theo đường dẫn app/Product.php. Các bạn điền đoạn code sau vào để lấy các trường dữ liệu từ table qua model
<?php

namespace App;

use Illuminate\Database\Eloquent\Model;

class Product extends Model
{
    protected $table = 'products';
    protected $fillable = [
        'title', 'body'
    ];
}
Bước 4: Tạo Web Route và API Route
Ở bước này các bạn vào routes/web.php để tạo web route. Nghĩa là khi bạn gõ url trên đường dẫn, nó sẽ nhận file views/wlecome.blade.php để render ra.
Route::get('/', function () {
    return view('welcome');
});
Vào routes/api.php để tạo api router và các thao tác của nó được thực hiện thông qua ProductController
Route::resource('products', 'ProductController');Bước 5: Tạo ProductController
Trong bước này bạn cần tạo một Resource Controller mới tên là ProductController thông qua dòng câu lệnh sau:
php artisan make:controller ProductController --resource
Sau khi chạy xong lệnh, các bạn vào đường dẫn : app/Http/Controllers/ProductController.php
Ở trong controller này, đã được tạo sẵn các phương thức như là: index(), store(), show(), update(), destroy(),… Bạn cần thực hiện theo đoạn code sau mà mình đã tạo sẵn:
<?php

namespace App\Http\Controllers;

use Illuminate\Http\Request;
use App\Product;

class ProductController extends Controller
{
    /**
     * Display a listing of the resource.
     *
     * @return \Illuminate\Http\Response
     */
    public function index()
    {
        $product = Product::all();
        return response()->json($product);
    }

    /**
     * Show the form for creating a new resource.
     *
     * @return \Illuminate\Http\Response
     */
    public function create()
    {
        //
    }

    /**
     * Store a newly created resource in storage.
     *
     * @param  \Illuminate\Http\Request  $request
     * @return \Illuminate\Http\Response
     */
    public function store(Request $request)
    {
        $product = new Product([
            'title' => $request->get('title'),
            'body' => $request->get('body')
        ]);
        $product->save();
        return response()->json('Add Product Successfully.');
    }

    /**
     * Display the specified resource.
     *
     * @param  int  $id
     * @return \Illuminate\Http\Response
     */
    public function show($id)
    {

    }

    /**
     * Show the form for editing the specified resource.
     *
     * @param  int  $id
     * @return \Illuminate\Http\Response
     */
    public function edit($id)
    {
        $product = Product::find($id);
        return response()->json($product);
    }

    /**
     * Update the specified resource in storage.
     *
     * @param  \Illuminate\Http\Request  $request
     * @param  int  $id
     * @return \Illuminate\Http\Response
     */
    public function update(Request $request, $id)
    {
        $product = Product::find($id);
        $product->title = $request->get('title');
        $product->body = $request->get('body');
        $product->save();

        return response()->json('Product Update Successfully');
    }

    /**
     * Remove the specified resource from storage.
     *
     * @param  int  $id
     * @return \Illuminate\Http\Response
     */
    public function destroy($id)
    {
        $product = Product::find($id);
        $product->delete();
        return response()->json('Product Deleted Successfully');
    }
}
Thế là bạn đã hoàn thành việc tạo một API để có thể lấy dữ liệu từ đây. Bạn có thể dùng phần mềm postman để kiểm tra API của bạn. Nếu bạn chưa biết nó là gì, hãy xem thêm tại đây.
Phần 2: Làm việc với phần frontend Reactjs
Để tiện theo dõi, thì mình sẽ tách Phần 2 ra ở một bài viết tiếp theo. Ở phần sau mình sẽ chủ yếu nói về các xử lý về phía client bằng Reactjs. Hẹn gặp các bạn ở bài viết tiếp theo, hãy cùng đón chờ và theo dõi nhé!. Nếu có bất kỳ thắc mắc nào, các bạn có thể comment tại đây, mình sẽ phản hồi lại sớm câu trả lời cho bạn.


2 bình luận
Bạn viết hay quá!!!!!Cảm ơn bạn.
[…] xử lý các phần còn lại ở phía Front-end thông qua Reactjs. Nếu các chưa xem qua bài viết lần trước thì mình khuyên các bạn nên đọc phần trước cho hiểu đã rồi mới xem qua bài […]